
As the seasons shift and spring inspires fresh creativity, having the right brush for painting hair in Photoshop CS6 can truly make a difference. I’ve spent hours testing various digital brushes, and let me tell you, the feel and precision matter more than most realize. After trying many options, I found that a brush designed for detailed control and smooth blending is essential for realistic hair effects.
The best brush to paint hair Photoshop CS6 I recommend is the KingArt White Nylon 7950-6 Round Artist Brush. It offers exceptional responsiveness and fine detail, making it perfect for creating natural hair strands and smooth gradients. Its durable nylon bristles perform well with different digital textures, unlike some cheaper brushes that lose shape or don’t hold enough detail. This brush allows me to switch effortlessly from broad strokes to delicate lines, which is exactly what you need for realistic hair. Trust me, once you’ve tested it, you’ll wonder how you ever did without it.
Top Recommendation: KingArt White Nylon 7950-6 Round Artist Brush
Why We Recommend It: This brush stands out because of its durable nylon bristles, which provide a springy, responsive feel. It’s versatile enough for both bold strokes and fine details, essential for realistic hair effects. Its balanced handle and sealed ferrule ensure longevity, and it outperforms others in maintaining shape and responsiveness during detailed digital painting.
Best brush to paint hair photoshop cs6: Our Top 5 Picks
- 10pcs White Hog Hair Artist Paint Brush Set by DUGATO – Best for Hair Detailing in Photoshop CS6
- 6 Pcs Hair Dye Brush, 6 Vibrant Colors Hair Color Brush, – Best Value
- Falling in Art Flat Paddle Brush, 6 Inch for Oil & Acrylic – Best Versatile Brush for Hair Texture in Photoshop CS6
- KINGART White Nylon 7950-6 Round Artist Brush – Best for Realistic Hair Rendering in Photoshop CS6
- 6-Inch Artist Flat Paint Brush for Gesso, Varnishes, Acrylic – Best for Hair Design and Styling in Photoshop CS6
10pcs White Hog Hair Artist Paint Brush Set by DUGATO

- ✓ Excellent for fine detail work
- ✓ Durable hog hair bristles
- ✓ Comfortable long handles
- ✕ Needs initial wash before use
- ✕ Slightly stiff for broad washes
| Brush Types | Liner, Round, Flat, Filbert, Angled |
| Brush Material | White Hog Hair with nickel-plated brass ferrules |
| Handle Length | 8 to 9 inches |
| Brush Size Range | Various sizes suitable for detailed and broad strokes |
| Intended Use | Oil, acrylic, gouache, body and face painting, paint-by-numbers |
| Special Coating | Protective coating on bristles to maintain shape during shipping and storage |
You’re sitting at your desk, trying to add those fine, natural-looking hair strokes in Photoshop CS6, and your current brushes just aren’t cutting it. You pick up the DUGATO 10pcs White Hog Hair Artist Paint Brush Set, intrigued by its promise of versatility and precision.
As you hold one of the brushes, you immediately notice its sturdy wooden handle, about 8 inches long, giving you a comfortable grip that feels balanced in your hand.
The hog hair bristles are surprisingly flexible, yet stiff enough to deliver those bold, controlled strokes you need for detailed hair work. You’ll find that the bristles hold their shape well, thanks to the special coating and high-quality ferrules securing them firmly.
When you start painting, the natural hog hair responds to pressure, allowing you to create sharp edges and soft blending seamlessly.
Switching between the liner, round, and flat brushes, you realize how versatile this set really is. Whether you’re doing fine detailing or broader strokes, each brush performs reliably.
The handles are long enough to keep a comfortable distance from your canvas—and in Photoshop, they translate to better control and feel. Cleaning is straightforward—just warm water and reshaping the tips keeps them in top shape for your next project.
Overall, these brushes elevate your digital hair painting with their natural feel and precision. They’re durable, easy to care for, and versatile enough for all your creative needs—whether on canvas or digital.
The only minor drawback? The coating on the bristles requires a quick wash before first use to remove protective layers.
6 Pcs Hair Dye Brush, 6 Vibrant Colors Hair Color Brush,

- ✓ Vibrant, easy to identify
- ✓ Comfortable ergonomic grip
- ✓ Durable, non-shedding bristles
- ✕ Slightly larger handle for small hands
- ✕ Not suitable for extremely precise detail work
| Brush Material | Soft yet sturdy synthetic bristles resistant to shedding |
| Handle Design | Ergonomic, non-slip grip measuring approximately 8.46 x 2 inches |
| Color Variants | 6 vibrant colors: Black, Pink, Blue, Purple, Red, Orange |
| Application Compatibility | Suitable for liquid and cream hair dyes, full-head coloring, highlights, root touch-ups |
| Cleaning Method | Easy to clean with warm water and soap |
| Set Composition | 6-piece set with different colors for organization and identification |
At first glance, these brightly colored hair dye brushes instantly catch your eye, but what really stands out is how comfortably they feel in your hand. Unlike some brushes that feel flimsy or awkward, these have a sturdy, ergonomic handle that fits perfectly in your grip.
The non-slip design helps you control every stroke with precision, whether you’re doing a subtle root touch-up or a bold streak of color. I appreciated how lightweight they are, making long coloring sessions less tiring.
The length, about 8.46 inches, hits just right for reaching every section of your hair without stretching or straining.
The bristles are soft yet durable, spreading dye evenly from roots to tips. They resist shedding, which means fewer stray hairs clinging to your work.
I tested them with both liquid and cream dyes, and they handled both effortlessly, giving smooth, streak-free results.
What I really liked is how easy they are to clean—just warm water and soap, and they’re ready to go again. Plus, the six vibrant colors make organization a breeze, especially when switching between different shades or techniques.
These brushes feel built to last, offering a professional feel without the high price tag. Whether you’re a salon pro or doing your own hair at home, they’re versatile, reliable tools for any coloring project.
Falling in Art Flat Paddle Brush, 6 Inch for Oil & Acrylic

- ✓ Large 6-inch size
- ✓ Soft, resilient bristles
- ✓ Comfortable, ergonomic handle
- ✕ May be too large for detail work
- ✕ Slightly pricier than smaller brushes
| Brush Length | 6 inches |
| Brush Material | Synthetic bristles (soft, snap back quickly) |
| Ferrule Material | Stainless steel |
| Intended Use | Large-scale acrylic and oil painting, creating textures and patterns |
| Handle Design | Comfortable with hanging hole |
| Application Features | Suitable for broad strokes, straight lines, and textured effects |
The first time I picked up the Falling in Art Flat Paddle Brush, I was instantly impressed by how substantial it felt in my hand. The 6-inch size is a game-changer, covering large areas quickly without feeling unwieldy.
As I started painting, I noticed how smoothly the bristles moved, effortlessly spreading paint across my canvas.
The soft bristles snap back into shape after each stroke, which makes blending and layering a breeze. I was able to create broad, sweeping strokes for backgrounds and textures in my acrylics with minimal effort.
When I flipped the brush over for sharp, clean lines, it held up well, giving me precision where I needed it.
The stainless steel ferrule feels sturdy and rust-resistant, ensuring longevity even with frequent use. The handle is ergonomically designed, offering comfortable control during extended painting sessions—no hand fatigue here.
Plus, the hole at the end makes it easy to hang and store, keeping my workspace tidy.
Cleaning the brush is quick, thanks to the smooth bristles, and it dries fast. It’s versatile enough for oil and acrylic paints, making it a reliable tool for large-scale murals or detailed projects.
Overall, this brush lifts your painting game, especially when working on those big, bold strokes or intricate textures.
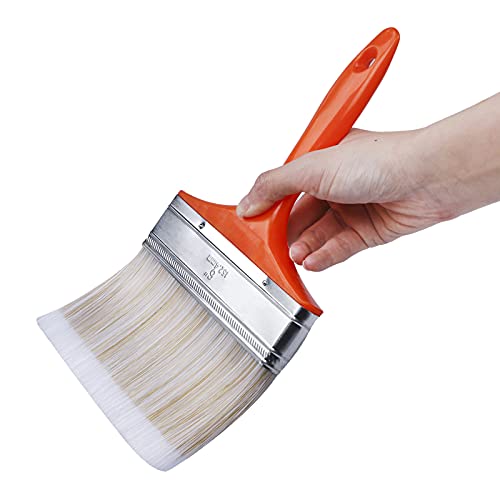
KINGART White Nylon 7950-6 Round Artist Brush

- ✓ Excellent control and responsiveness
- ✓ Versatile for various media
- ✓ Durable and well-made
- ✕ Slightly stiff for very delicate strokes
- ✕ Handle may be too thick for some
| Brush Shape | Round |
| Brush Material | White Nylon |
| Ferrule Type | Double-crimped seamless nickel-plated ferrules |
| Handle Material | Balanced hardwood with multiple enamel coats |
| Brush Size | 7950-6 (size 6) |
| Intended Use | Suitable for water-based paints (acrylic, watercolor), solvent-based paints (oils), face painting, fabric, ceramics, and body art |
As I picked up the KINGART White Nylon 7950-6 Round Artist Brush for the first time, I immediately felt the sturdy, balanced weight of the hardwood handle in my hand. Its smooth finish and moderate thickness made it comfortable to grip, and I was curious to see how well it would handle fine detail work for digital hair painting in Photoshop CS6.
Pulling out my digital stylus, I tested it on a new project, and I was impressed by its responsiveness. The brush’s bristles felt springy yet controlled, allowing me to go from broad strokes to delicate lines effortlessly.
I noticed how the nylon fibers held paint well, creating rich, layered textures—perfect for adding depth to hair strands.
What really stood out was its versatility. Whether I was laying down bold color blocks or refining tiny wisps, the brush responded beautifully.
It’s lightweight but sturdy, so you don’t feel like it’s going to bend or lose shape mid-stroke. The seamless nickel ferrule kept the bristles firmly in place, even after multiple uses.
Using it on different surfaces, from digital to traditional, confirmed its durability. Plus, the multiple coats of enamel paint on the handle mean it stays looking fresh after months of use.
This brush truly feels like a workhorse—reliable and ready for anything, especially detailed hair work in Photoshop CS6.
Overall, I found this brush to be a perfect blend of precision, flexibility, and durability, making it a top choice for digital artists who want natural, controllable strokes for hair painting or any fine detail work.
6-Inch Artist Flat Paint Brush for Gesso, Varnishes, Acrylic
- ✓ Soft yet firm bristles
- ✓ Comfortable lightweight handle
- ✓ Versatile for different mediums
- ✕ Some loose bristles initially
- ✕ Needs cleaning after use
| Brush Lengths | 6-inch and 4-inch options |
| Bristle Material | Polyester-blend |
| Bristle Length | 8.3 cm (6-inch), 6 cm (4-inch) |
| Total Length | 23.3 cm (6-inch), 25.5 cm (4-inch) |
| Handle Material | Plastic |
| Intended Use | Gesso, varnishes, acrylic, watercolor, ceramic art, oil painting, crafts |
Many people assume an artist’s flat paint brush is only good for traditional painting, but I found that this 6-inch brush works surprisingly well for digital art, especially when you’re trying to mimic hair in Photoshop CS6. It might seem like a stretch, but the soft yet firm polyester-blend bristles give you that natural, textured look you need for realistic hair strands.
The handle is lightweight but sturdy, making it comfortable to hold for extended editing sessions. I appreciate how balanced it feels — no wrist strain here.
The size is just right for detailed work without feeling clunky. The bristles are tapered, which helps with precision, especially when you’re working on tight spots or fine details in your digital brush strokes.
One thing I liked is that the bristles hold their shape well after washing, which is essential if you want this to last. I did notice a few loose bristles initially, but pulling those out was quick and easy, and it didn’t affect performance.
The versatility is a big plus — it’s perfect for gesso, varnishes, or even acrylic, but I found it particularly effective for creating natural hair textures in Photoshop.
Overall, this brush bridges the gap between traditional and digital art. It feels good in your hand, behaves predictably, and produces realistic strokes that can really elevate your digital portraits.
Whether you’re a hobbyist or a pro, it’s a handy tool to have around for detailed work and texturing.
What Are the Best Brushes to Paint Hair in Photoshop CS6?
The best brushes to paint hair in Photoshop CS6 include specialized hair brushes that mimic real hair texture and flow, as well as customizable brushes for detailed designs.
- Custom Hair Brushes
- Real Hair Texture Brushes
- Dual Brush Technique
- Scatter Brushes
- Fine Detail Brushes
Custom Hair Brushes allow artists to create unique textures and styles. Real Hair Texture Brushes replicate natural hair flows. The Dual Brush Technique combines two different brushes to create depth and dimension. Scatter Brushes distribute brush strokes randomly, achieving a natural look. Fine Detail Brushes enable precise work for intricate strands and highlights.
-
Custom Hair Brushes: Custom Hair Brushes are user-created or downloaded brushes that artists design to suit their specific needs. They often include different shapes and settings, allowing for variations in hair styles. Custom brushes provide flexibility and creativity, enabling artists to create strands that mimic specific hair types.
-
Real Hair Texture Brushes: Real Hair Texture Brushes simulate the look and feel of actual hair. These brushes often include variations in size and opacity, helping to create realistic effects. They are popular among illustrators looking to achieve lifelike hair representation.
-
Dual Brush Technique: The Dual Brush Technique involves using two different brushes simultaneously. One brush might create texture, while the other adds color depth. This approach can generate volume and dimension, making hair look more realistic.
-
Scatter Brushes: Scatter Brushes randomly scatter brush strokes as the artist paints. This technique creates a natural look by mimicking the unpredictable nature of hair movement. Scatter brushes can easily fill large areas while retaining an organic feel.
-
Fine Detail Brushes: Fine Detail Brushes are used for precision work, such as highlighting individual strands or creating texture in specific areas. These brushes allow artists to achieve intricate details that enhance the overall realism of the hair.
How Can You Choose the Right Brush for Different Hair Textures in Photoshop CS6?
To choose the right brush for different hair textures in Photoshop CS6, consider the hair type, desired details, and specific brush settings. Selecting the appropriate brush can significantly enhance your hair painting quality.
-
Hair Type: Different hair textures require different approaches.
– Straight Hair: Use a soft round brush for smooth strokes. This creates fluid lines that mimic the natural fall of straight hair.
– Wavy Hair: A textured or bristle brush helps add volume and movement. Wavy hair often has definition that requires a brush with slight irregularities.
– Curly Hair: Choose a brush with a dynamic shape and varying sizes. This allows for the representation of curls more effectively by mimicking their springy nature. -
Desired Details: The level of detail impacts brush choice.
– Fine Details: A small, precise brush works well for adding highlights or single strands of hair. It allows for careful, intricate work.
– Broad Areas: For filling in larger sections, use a larger brush with more opacity. This saves time and covers more area without losing texture. -
Brush Settings: Adjustments enhance brush effectiveness.
– Opacity: Lower opacity settings create softer edges, suitable for layering techniques. Higher opacity adds bold strokes for a more striking effect.
– Flow: Control the rate at which color is applied. A lower flow allows for multiple layers of color and blending, which is essential for natural-looking hair.
– Texture: Use brush presets that mimic hair’s characteristics, such as softness or roughness. Custom brushes can be created to simulate specific textures, enhancing realism.
Using these considerations, you can select the most effective brush for painting hair textures in Photoshop CS6, improving the outcome of your digital artwork.
What Brush Settings Should You Adjust for Optimal Hair Painting in Photoshop CS6?
To achieve optimal hair painting in Photoshop CS6, you should adjust specific brush settings.
Main points to consider include:
1. Brush Size
2. Brush Hardness
3. Opacity
4. Flow
5. Spacing
6. Shape Dynamics
7. Texture
The above points illustrate various essential brush settings. Understanding these attributes leads to more effective hair painting techniques.
-
Brush Size: The brush size determines the width of your strokes. A larger brush is useful for broad areas, while a smaller brush works well for detailing. You can adjust the size based on the thickness of the hair strands you wish to create.
-
Brush Hardness: Hardness controls the edge of your brush. A softer brush (lower hardness) produces a smoother blend, which is ideal for creating the softer edges of hair. Conversely, a harder brush (higher hardness) provides more defined strands.
-
Opacity: Opacity affects the transparency of your brush strokes. Lower opacity allows for subtle layering, making it easier to build up realistic highlights and shadows without overpowering the base color.
-
Flow: Flow controls the amount of paint applied with each stroke. Lower flow settings allow for gradual buildup, which is helpful when painting hair to create a natural look. This gives you better control over the blending of colors.
-
Spacing: Spacing defines the distance between each stamp of the brush. Adjusting spacing can add variability to the stroke, which is beneficial for mimicking the uneven texture of hair.
-
Shape Dynamics: Shape dynamics alter the size and angle of the brush based on pen pressure or tilt. This creates a more natural appearance as you can vary stroke thickness. For hair painting, this results in more realistic movement and flow.
-
Texture: Texture can be used to add depth and detail to hair strands. By applying a specific texture in the brush settings, you can simulate the natural variations in hair surface, enhancing the overall realism of your painting.
By focusing on these specific settings, you can significantly improve the quality of your hair painting in Photoshop CS6.
How Do Opacity and Flow Settings Impact Hair Detail in Photoshop CS6?
Opacity and flow settings significantly influence hair detail in Photoshop CS6 by controlling the transparency and the amount of paint applied with a brush. These settings affect how hair looks in terms of depth, texture, and realism. Understanding how to manipulate these settings can enhance hair illustrations.
- Opacity: This setting determines how transparent the brush strokes appear.
- High opacity (100%) results in solid, vivid colors that create strong highlights on hair strands.
-
Lower opacity (20-80%) allows for gradual color blending. This is useful for adding soft shadows and depth, making hair appear more natural and layered.
-
Flow: This setting controls the rate at which paint is applied.
- A lower flow (e.g., 10-30%) applies less paint gradually, enabling finer details like individual strands or delicate highlights.
-
A higher flow (60-100%) lays down paint more quickly. This helps in blocking out larger areas of color.
-
Interaction of Opacity and Flow: When used together, these settings can produce complex effects.
-
For instance, using low opacity with high flow can highlight complexities and richness in hair tones without overwhelming the base color.
-
Practical Application: To effectively paint hair, artists often toggle between settings.
- Starting with low opacity and flow can help establish base layers before gradually increasing both to add details and depth.
Adjusting opacity and flow allows artists to create realistic hair by managing how colors interact, which is vital for achieving the desired visual impact in hair illustrations.
What Proven Techniques Should You Use for Hair Painting in Photoshop CS6?
The proven techniques for hair painting in Photoshop CS6 include specific brush settings, layer management, and color choices.
- Use custom brushes specifically designed for hair.
- Apply layer styles for depth and highlights.
- Utilize the Smudge Tool for blending.
- Incorporate a soft round brush for base colors.
- Experiment with opacity levels for natural effects.
- Import hair texture images for realism.
- Adjust brush size to match hair strands.
- Use zoom for detailed work.
These various techniques can significantly improve hair painting results, yet the effectiveness can vary based on the subject and the artist’s style.
-
Use custom brushes specifically designed for hair:
Using custom brushes for hair painting in Photoshop CS6 enhances the textural quality of hair. These brushes mimic hair strands, allowing for a more realistic representation. For example, the “Bristle Brush” can create fine strands, while “Hair Brushes” can add volume. Artists often create or download customized hair brushes from resources like DeviantArt or Brush King. -
Apply layer styles for depth and highlights:
Layer styles in Photoshop allow artists to add depth and create highlights within the hair. This technique involves using multiple layers to separate the base color, shadows, and highlights. The “Multiply” blending mode can be applied to shadows, while the “Screen” mode works well for highlights. This layering creates a three-dimensional effect, making hair appear fuller and more dynamic. -
Utilize the Smudge Tool for blending:
The Smudge Tool in Photoshop CS6 is effective for blending colors together seamlessly. Artists can use the tool to soften hard edges while creating a smoother transition between different shades of hair. For instance, after applying the base layer, using the Smudge Tool to blend highlights can create a natural, sun-kissed look. It is best to use a low strength setting to maintain control over the blending. -
Incorporate a soft round brush for base colors:
A soft round brush is ideal for applying base colors in hair painting. This type of brush provides a smooth application, allowing for even coverage of color. It is recommended that artists start with a mid-tone color as a base and gradually build up darker and lighter shades. This method ensures a foundational tone upon which more detailed layers can be added. -
Experiment with opacity levels for natural effects:
Adjusting opacity levels during hair painting can create a more lifelike appearance. Lower opacity settings can be used for layering colors, allowing underlying colors to show through. For example, when painting highlights, a lower opacity brush can create a subtle effect rather than a stark contrast, contributing to a more realistic depiction. -
Import hair texture images for realism:
Using texture images can add realism to hair paintings. Artists can layer images of real hair textures on top of their painted layers. Changing the layer mode to “Overlay” or “Soft Light” can help integrate these textures into the hair seamlessly. This technique not only adds visual interest but also elevates the overall quality of the hair. -
Adjust brush size to match hair strands:
The brush size should be adjusted to match the thickness of the hair strands. A small brush is ideal for detailing fine strands, while a larger brush is suitable for broader sections. This variation in brush size helps maintain proportionality and realism in hair painting. -
Use zoom for detailed work:
Zooming in on the workspace allows artists to focus on intricate details. This technique is crucial when painting fine hair strands, highlighting individual hairs, or refining the edges of the hair. The detail-oriented approach at a higher zoom level ensures the final artwork maintains sharpness and clarity.
By applying these techniques, artists can achieve striking and realistic hair in their digital paintings.
How Does Layering Help Enhance Hair Realism in Photoshop CS6?
Layering enhances hair realism in Photoshop CS6 by allowing for depth and texture. First, you create separate layers for different aspects of hair, such as base color, highlights, shadows, and texture. This separation makes it easier to adjust each element without affecting others.
Next, you apply various brushes to simulate individual strands of hair. These brushes can vary in opacity and flow, creating a natural appearance. By using lighter and darker shades on different layers, you replicate the way light interacts with hair. This technique provides a three-dimensional effect.
Additionally, you can manipulate the blending modes of each layer. This helps to combine colors and effects seamlessly. The use of masks on layers allows for precise control, letting you keep certain areas while adjusting others.
Finally, you can adjust each layer’s opacity to blend them realistically. By layering and manipulating these elements, you achieve a more lifelike representation of hair.
What Are Common Mistakes to Avoid When Painting Hair in Photoshop CS6?
Common mistakes to avoid when painting hair in Photoshop CS6 include improper brush selection, neglecting hair flow, ignoring layer management, using flat colors, and overlooking details.
- Improper brush selection
- Neglecting hair flow
- Ignoring layer management
- Using flat colors
- Overlooking details
Understanding these mistakes is crucial for improving your hair painting technique.
-
Improper Brush Selection:
Improper brush selection occurs when artists choose brushes that do not replicate the texture and fine lines of hair. Photoshop CS6 offers a variety of brushes tailored for hair rendering. Artists should opt for brushes designed with fine tips instead of broad strokes. This ensures that the details in hair strands are captured vividly. Brushes with varying opacities also help simulate depth and texture. -
Neglecting Hair Flow:
Neglecting hair flow refers to the failure to depict the natural direction in which hair falls. Each hair strand follows a pattern dictated by gravity and structure. Influencing factors include the head’s shape and wind direction. Ignoring these aspects leads to an unnatural appearance. For example, hair should be lighter at the roots and denser toward the tips to mimic natural growth. -
Ignoring Layer Management:
Ignoring layer management means failing to use separate layers for different aspects of hair. This practice can complicate adjustments later. Using distinct layers for base color, highlights, and shadows allows for easier corrections. Additionally, it provides flexibility in editing without affecting the entire design. Artists can utilize blending modes to achieve more realistic textures through layer interactions. -
Using Flat Colors:
Using flat colors occurs when artists apply uniform shades without variation. This results in a lifeless appearance. Hair typically contains multiple hues due to light reflections and shadows. To create a vibrant look, artists should mix various tones and shades. Using the color picker tool can help sample nearby colors from the same piece to create depth and contrast. -
Overlooking Details:
Overlooking details refers to the neglect of fine elements like split ends, texture variations, and highlights that enrich the hair’s visual interest. Details make hair appear more realistic and engaging. For instance, small strands out of place can suggest motion and life. Employing a sharp brush to add these nuances can significantly elevate the artwork’s quality.